SpringBoot的基础使用和thymeleaf
一. 什么是SpringBoot
- Spring Boot是由Pivotal团队提供的全新框架,其设计目的是用来简化Spring配置和启动的。
二. SpringBoot的优势
- 快速启动:Spring Boot内置了Web容器,可以快速启动一个Web项目
- 简化配置:Spring Boot提供了一种特殊的方式,使得我们无需再编辑大量的配置文件,提高开发效率
- 易上手:Spring Boot在Spring的基础上进行优化,上手非常简单
- 无需手动管理依赖jar包的版本
- Spring Boot把需要使用到的技术的jar包整合为一个Spring Boot Starter,并且每个Spring Boot版本都有定义好的一些默认版本,会随着Spring Boot版本的升级而升级这些技术的Jar包,也可以自定义指定版本但是不推荐。
- springboot 1.x springboot2.x
- 常见的Spring Boot Starter
- spring-boot-starter-web:Web支持,其实就是springmvc简化使用,jar包组
- Spring-boot-starter-jdbc: springboot对jdbc支持
- Spring-boot-starter-data-jpa: springboot对data jpa支持
- Spring-boot-starter-mybatis: springboot对mybatis支持
- Spring-boot-starter-test:springboot对test支持
- 注意:Spring Boot所有简化都与Maven有关,其根本是通过封装Maven方式对Spring应用开发进行进一步的封装和简化。
三. maven的父子项目
- 父项目:只负责管理jar包,用于给子模块继承,不写任何代码;
- 子模块:
- 如果是公共jar包从父项目中继承,如果是本模块独有的jar包就在本模块中引入
- 编写模块对应功能代码
四. 创建SpringBoot项目
导入依赖
1
2
3
4
5
6
7
8
<!--
Spring Boot 父节点依赖,引入这个之后相关的引入就不需要添加version配置,Spring Boot会自动选择最合适的版本进行添加
-->
<parent>
<groupId>org.springframework.boot</groupId>
<artifactId>spring-boot-starter-parent</artifactId>
<version>2.3.9.RELEASE</version>
</parent>添加Web依赖
可以添加到父项目,也可以是子模块
1
2
3
4
5
6
7
<!-- 添加spring-boot-starter-web依赖,引入此依赖之后,web相关jar包全部都会引入进来 -->
<dependency>
<!-- SpringBoot依赖组ID,固定写法 -->
<groupId>org.springframework.boot</groupId>
<!-- 只要是被SpringBoot管理的jar包,那么在引入的时候都是spring-boot-starter-Xxx -->
<artifactId>spring-boot-starter-web</artifactId>
</dependency>
编写启动类
启动类的位置一定要在域名包下,否则注解扫描失败。
1
2
3
4
5
6
7//启动类
public class DemoApp {
public static void main(String[] args) {
SpringApplication.run(DemoApp.class, args);
}
}
@SpringBootApplication- 在启动类中的
@SpringBootApplication中有一个组件扫描注解@ComponentScan,此注解会帮助我们扫描启动类同级包以及启动类一下的所有包,所以只要我们的启动类位置放对了,那么所有注解都会扫描到;由spring帮我们管理。 @SpringBootApplication是一个复合注解:此注解中的重要注解@SpringBootConfiguration:标注在某个类上,表示这是一个SpringBoot的配置类@EnableAutoConfiguration:告诉SpringBoot开启自动配置功能@ComponentScan:组件扫描注解,SpringBoot默认配置就是去扫描启动类包及其以下所有包
- 在启动类中的
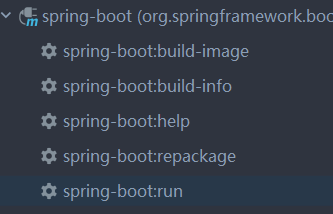
五. SpringBoot启动的三种方式
main方法启动-开发环境;
引入插件通过插件启动, 双击插件中的spring-boot-run启动。
1
2
3
4
5
6
7
8
9
10
11
12
13
<!-- SpringBoot启动插件 -->
<build>
<plugins>
<plugin>
<groupId>org.springframework.boot</groupId>
<artifactId>spring-boot-maven-plugin</artifactId>
<configuration>
<!--fork : 如果没有该项配置,可能devtools不会起作用,即应用不会restart -->
<fork>true</fork>
</configuration>
</plugin>
</plugins>
</build>
打包运行 - 线上环境jar包位置在
cmd窗口执行命令 :java -jar xxx.jar
六. SpringBoot热部署
热部署其实就是动态加载字节码,在我们修改了代码之后无需重启项目即可更改字节码,
SpringBoot或者说IDEA默认是没有此功能的。热部署原理
spring-boot-devtools是一个为开发者服务的一个模块,其中最重要的功能就是自动应用代码更改到最新的App上面去。原理是在发现代码有更改之后,重新启动应用,但是速度比手动停止后再启动还要更快,更快指的不是节省出来的手工操作的时间。- 其深层原理是使用了两个
ClassLoader,一个Classloader加载那些不会改变的类(第三方Jar包),另一个ClassLoader加载会更改的类(自己写的),称为 restartClassLoader,这样在有代码更改的时候,原来的restartClassLoader被丢弃,重新创建一个restartClassLoader,由于需要加载的类相比较少,所以实现了较快的重启时间(5秒以内)。
依赖
1
2
3
4
5
6
7
<!-- SpringBoot热部署依赖 -->
<dependency>
<groupId>org.springframework.boot</groupId>
<artifactId>spring-boot-devtools</artifactId>
<optional>true</optional>
<scope>true</scope>
</dependency>使用方式
方式一:修改了代码之后,手动编译一下 ——> ctrl+F9;
方式二:修改IDEA配置,让其自动编译
File -> Settings -> Compiler -> Build Project automatically选中,保存
Shift+Ctrl+Alt+/ ,选择 “Registry” ,选中打勾
“compiler.automake.allow.when.app.running”PS:方式二编译时机是IDEA失去焦点时,会自动编译,推荐使用方
七. SpringBoot配置
配置文件
application.properties- 传统方式,不太优美application.yml/yaml - 推荐使用
配置文件作用
- 修改
SpringBoot自动配置的默认值
- 修改
多种配置文件都存在时:
SpringBoot优先加载yml配置文件,再加载properties配置文件,会被覆盖。properties优先级最高。- 如果配置的内容都相同,那么properties生效;
- 如果配置的内容不冲突,那么都生效;
简单配置
1
2
3
4
5
6
server:
# 配置端口号
port: 8088
servlet:
# 配置上下文路径
context-path: /yml两种多模式配置方式
方式一:
yml多文档块模式 多个环境之间需要以 —- 隔开1
2
3
4
5
6
7
8
9
10
11
12
13
14
15
16
17
18
19
20
21
22
23
24
25
26
27
28
29
30
31
32
33# 指定启用那个环境
spring:
profiles:
# 启用环境的名称
active: test
server:
# 配置端口号
port: 8081
# 指定此环境名称
spring:
# 开发环境
profiles: dev
# 多个环境之间需要以 --- 隔开
server:
port: 8082
# 指定此环境的名称
spring:
# 测试环境
profiles: test
# 多个环境之间需要以 --- 隔开
server:
port: 8083
# 指定此环境的名称
spring:
# 线上环境
profiles: pro方式二:多profile文件模式
- 不同的环境写在不同的YML文件中
- 命名规范:application-{profiles}.yml
- 在主YML文件中进行引用。
- 不同的环境写在不同的YML文件中
八. SpringBoot测试
引入SpringBoot测试包
1
2
3
4
5
<!-- SpringBoot测试依赖包 -->
<dependency>
<groupId>org.springframework.boot</groupId>
<artifactId>spring-boot-starter-test</artifactId>
</dependency>创建SpringBoot测试类
1
2
3
4
5
6
7
8
9
10
11
12
13
14
15
// 表示把JUnit测试运行在Spring容器中,并且SpringBoot无需指定JUnit版本,对任何版本都支持
// 被@SpringBootApplication修饰的类不仅是一个启动类,同时也是一个配置类,所以我们只需要告诉SpringBoot测试,我们的启动类是谁即可
public class SpringbootTest {
private MyBean myBean;
public void test(){
System.out.println(myBean);
}
}
九 SpringBoot集成mybatis
依赖
1
2
3
4
5
6
7
8
9<dependency>
<groupId>org.mybatis.spring.boot</groupId>
<artifactId>mybatis-spring-boot-starter</artifactId>
<version>2.2.2</version>
</dependency>
<dependency>
<groupId>mysql</groupId>
<artifactId>mysql-connector-java</artifactId>
</dependency>yml配置
1 | server: |
十. SpringBoot事务管理
事务:一组操作要么同时成功要么同时失败
事务应该管理在Service层,但是
SpringBoot默认是没有管理Service层的事务的,所以我们需要手动开启事务。1
2
3
4
5
6
//开启事务
public void save(Emp emp) {
mapper.save(emp);
// System.out.println(1/0);
}
十一. 事务传播机制
@Transactional配置
@Transactional注解不仅可以加在类上给当前类全局配置,还可以加在方法上,方法@Transactional注解优先级更高
- @Transactional用在类上:类下的所有方法增删改方法 和 查询方法都进行了事务管理
- @Transactional用在方法上:只会在当前方法生效
@Transactional的属性
Propagation propagation() default Propagation.REQUIRED; — 事务传播机制boolean readOnly() default false; — 是否只读,查询配置true,增删改配置false
事务传播机制 参考链接:https://blog.csdn.net/weixin_44771989/article/details/123967275
Propagation.REQUIRED:默认,支持当前事务,如果当前没有事务,就创建一个事务,保证一定有事务 — 增删改方法使用Propagation.SUPPORTS:支持当前事务,如果当前没有事务,就不使用事务 — 查询方法使用Propagation.REQUIRES_NEW:新建事务,如果当前有事务,就挂起 — 不常用Propagation.NEVER:不支持事务,如果当前有事务,就抛出异常 — 不常用@Transactional最终配置
因为在真实开发中,一个类中增删改查,查询方法占的比例最多,所以我们会在类上使用查询的全局配置,增删改在方法上单独配置;
- 在类上配置:
@Transactional(readOnly = true,propagation = Propagation.SUPPORTS)//查询的事务控制方式
- 在类上配置:
在方法上配置:
@Transactional //默认 readOnly = false,propagation = Propagation.REQUIRED
十二. Thymeleaf
Thymeleaf是一个模板技术
- 其他模板技术:Freemarker、jsp、Velocity等.
- 详细语法参考:https://fanlychie.github.io/post/thymeleaf.html
SpringBoot-Thymeleaf
依赖
1
2
3
4
5<!-- 引入thymeleaf模板依赖 -->
<dependency>
<groupId>org.springframework.boot</groupId>
<artifactId>spring-boot-starter-thymeleaf</artifactId>
</dependency>
默认的视图解析器前缀就在根目录下的templates文件夹下,所以我们将html代码放在根目录下的templates文件夹下即可;
默认后缀就是.html,所以Thymeleaf是以html文件为模板;
配置
1
2
3
4
5
6
7thymeleaf:
cache: false
encoding: utf-8
mode: HTML5
enabled: true
prefix: classpath:/templates/
suffix: .html语法
1
2
3
4
5
6
7
8
9
10
11
12
13
14
15
16
17
18
19
20
21
22
23
24
25文本显示:<span th:text="${username}">Jack</span>
对象取值:<span th:text="${user.name}"></span>
超链接:<a th:href="@{/order/details(orderId=${obj.id},name=${obj.name})}">view</a>
引入静态资源:
语法:th:[href | src]@{资源在static下的目录}, 如:@{/lib/jquery.js},不填写默认的static文件夹
例子:<link rel="stylesheet" th:href="@{/css/index.css}">
<script th:src="@{/js/jquery-min.js}"></script>
注意:SpringBoot项目静态资源默认要放在src/mian/resources/static/下
判断:
<span th:if="${user.age == 23}">
青年
</span>
选中【其中一种】:
<td>
<div class="input-append">
<input name="sex" type="radio" value="男" th:checked="${student.sex=='男'}" />男
<input name="sex" type="radio" value="女" th:checked="${student.sex=='女'}" />女
</div>
</td>
循环:
<tr th:each="emp : ${emps}">
<td th:text="${emp.id}">1</td>
<td th:text="${emp.name}">海</td>
<td th:text="${emp.age}">18</td>
</tr>